Previous design
Without any particular rigor or anything else, in my previous design of drone I went for the Aluminium-honeycomb-Aluminium sandwich structure on the basis that everyone knows that it’s the highest strength to weight system that you can get. That may be true, but I think that for my application it’s overkill sendcutsend.com’s minimum aluminium thickness is 0.6mm, which for a drone that was designed to keep 140g of Li-ion cells in the air is actually total overkill.
Less fancy, more print
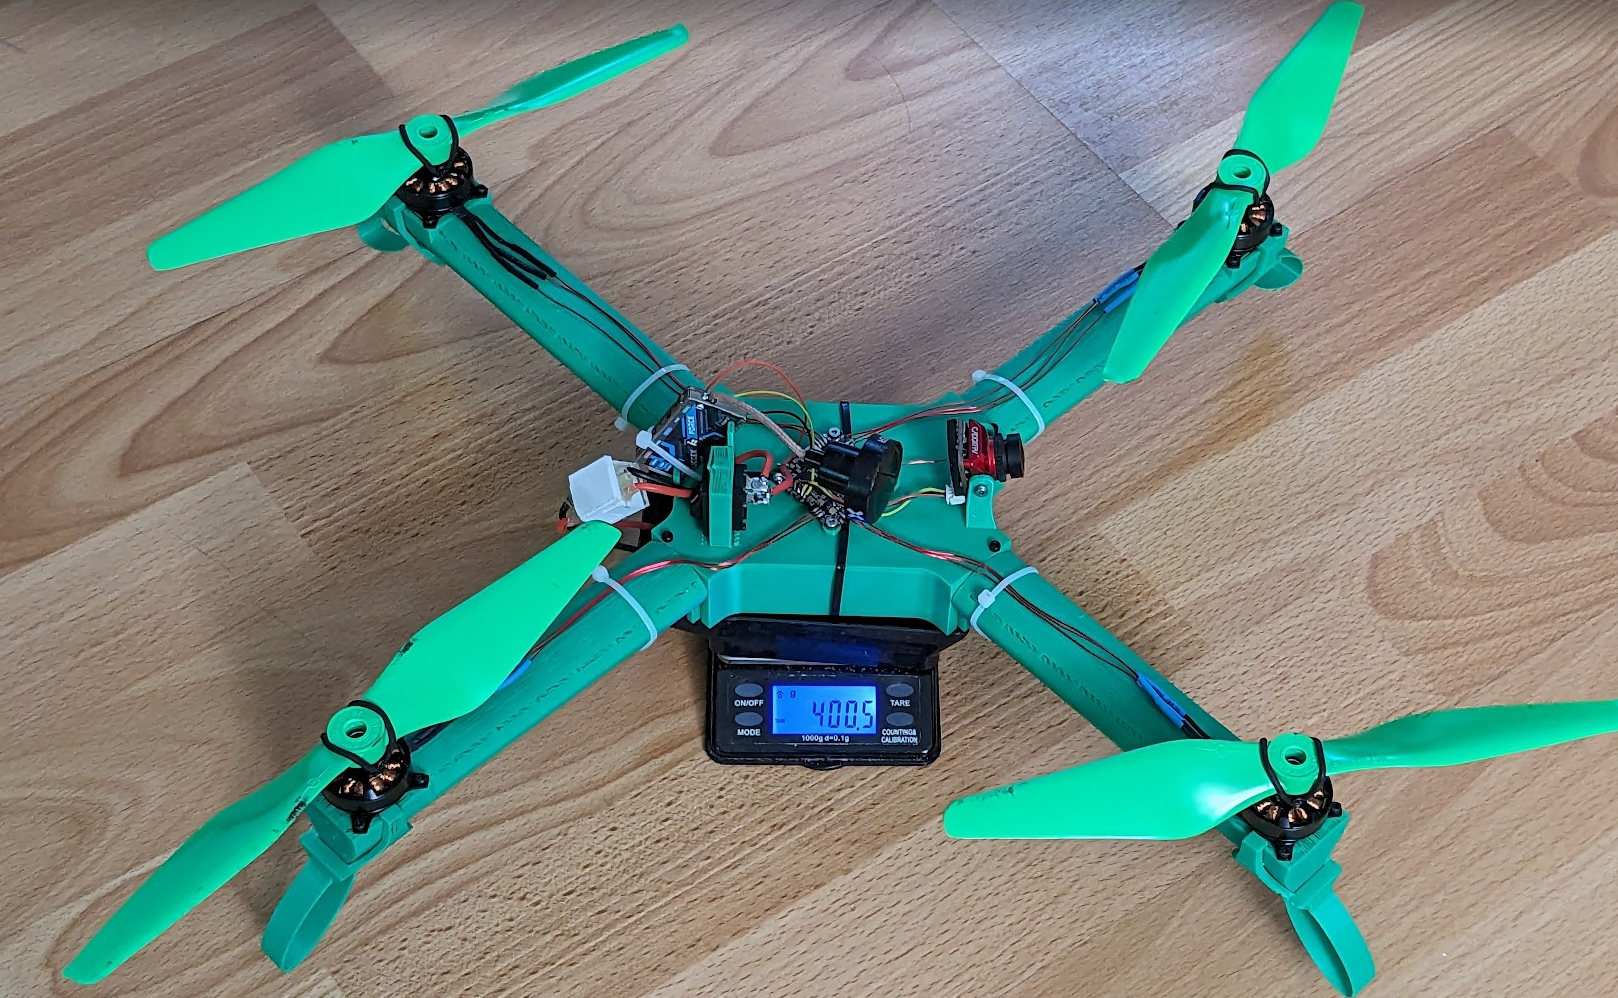
Instead, why not just print the whole thing? A couple hours of designing later, and I came up with something where each arm weighs a mere 11g and the frame as a whole weighs 72.9g:
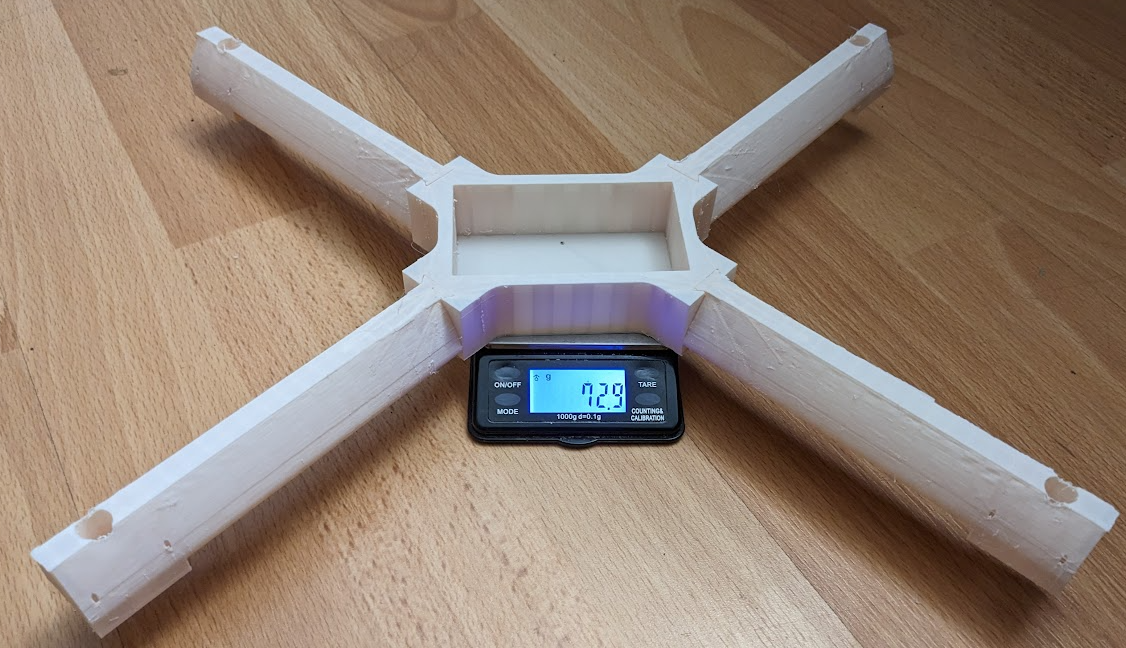 Contrast this with the old design where (bolts included) each arm weighed 25g. The middle weighed a bit less I think, but still overall the new design is clearly lighter and easier to assemble.
The new frame is sized to hold 9” props, although I actually only have 8040 props right now.
This is a pretty decent improvement on the previous system not just because of the absence of Al plating on the top and bottom, but also because of how many fewer bolts are required.
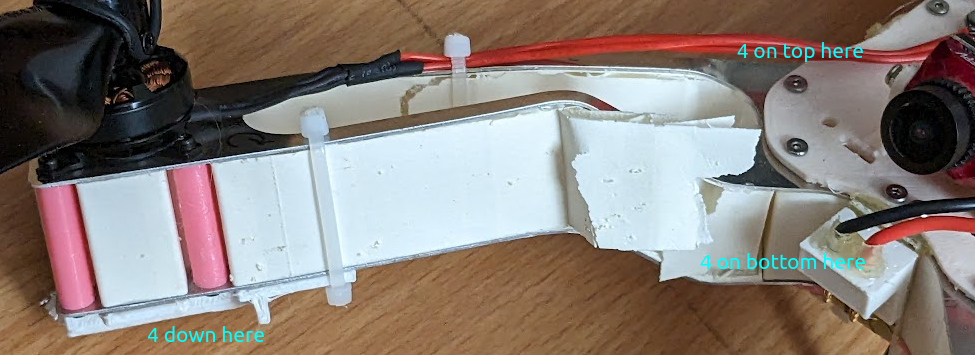
The old design had three bolts on the top and the bottom of each side, for a total of 4*2*8 = 64 bolts for the inside of the frame. In addition to this to keep the honeycomb structure together, there were 4 bolts on the end of each of the arms (so another 16):
Contrast this with the old design where (bolts included) each arm weighed 25g. The middle weighed a bit less I think, but still overall the new design is clearly lighter and easier to assemble.
The new frame is sized to hold 9” props, although I actually only have 8040 props right now.
This is a pretty decent improvement on the previous system not just because of the absence of Al plating on the top and bottom, but also because of how many fewer bolts are required.
The old design had three bolts on the top and the bottom of each side, for a total of 4*2*8 = 64 bolts for the inside of the frame. In addition to this to keep the honeycomb structure together, there were 4 bolts on the end of each of the arms (so another 16):
 80 bolts is a lot
The new design uses 4. One to secure the dovetail joint that each of the arms have. The regular nozzle size for a 3d printer is 0.4mm, and printing each arm with even a single wall of thickness resulted in something like a 20g part. No good at all. Printing with a 0.2mm nozzle gives acceptable results, but means each arm takes like 8 hours to print on my ender 3 v2.
The new 11g also includes reinforcement on the interior of the print that I had to put in manually. here is an image of the arm during printing:
80 bolts is a lot
The new design uses 4. One to secure the dovetail joint that each of the arms have. The regular nozzle size for a 3d printer is 0.4mm, and printing each arm with even a single wall of thickness resulted in something like a 20g part. No good at all. Printing with a 0.2mm nozzle gives acceptable results, but means each arm takes like 8 hours to print on my ender 3 v2.
The new 11g also includes reinforcement on the interior of the print that I had to put in manually. here is an image of the arm during printing:
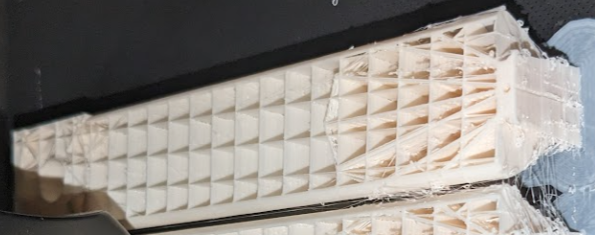 Where you can see the regular grid pattern of the infill and my manual support lines radiating out from the dovetail joint. This is absolutely required of course, the arms attachment is pathetically weak without it. There is corresponding reinforcement on the inside of the drone:
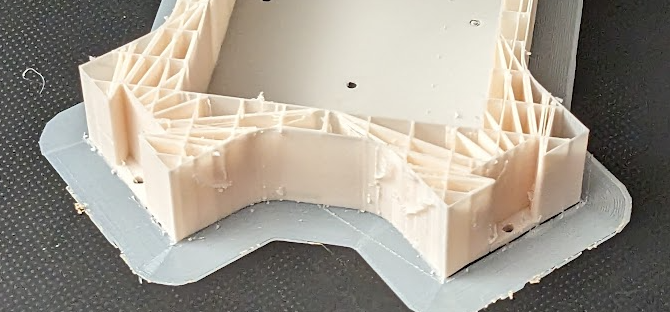 which increased its weight to like 25g (ouch). I don’t think that I placed the reinforcement particularly well here, though.
Failure modes
The new drone definitely performs better - hovering requires about 5.5/6 amps, as opposed to about 7.5 with the previous iteration. Not bad, but not stunning either. I’m using Samsung 40T batteries at the moment (4Ah capacity), which gives me a flight time of like 40 minutes. They have a great discharge rate of 35A, but I don’t really need that I think. Something like the Samsung 50S which has a 5Ah rating seems more appropriate. I don’t know if I’ll bother to buy some just yet, though. I still think the propellers warrant some more attention.
Impact resistance
I flew the new version of the drone for a total of about half an hour of air time before it died.
I hit some foliage going sideways slowly at an altitude of about 1.5m. Interestingly the failure mode was that the screw holding in the dovetail joint tore out - I did not expect this!
You can see here though that the slicer got a bit excited and decided to turn one of my reinforcing bits into a notch:
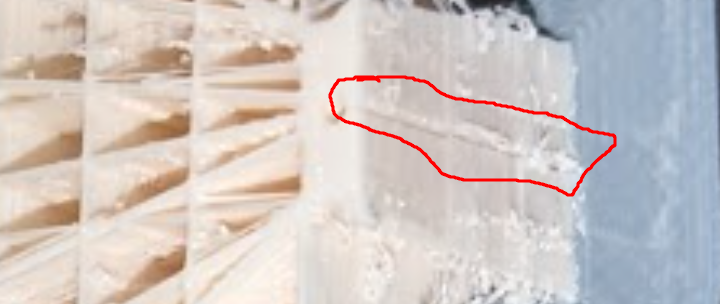 which I am sure did not help its strength.
Something to note for the next version, then.
which I am sure did not help its strength.
Something to note for the next version, then.
The next version
This version was printed on a new bambu lab P1P using a 0.4mm nozzle. I have a 0.2mm nozzle but changing it looks to be such a pain that I haven’t. With this new printer and nozzle size it takes me 3 hours to print the entire drone as opposed to 7 hours to print one arm. Noice.
Here is what it looks like:
I wrote some notes on how I adjusted the print settings here, but although the bambu lab slicer took way more effort to get working I think that the final result is better. The double solid dovetail is far far stronger than what came before it. How much of an actual advantage that is is up for discussion though.
A few minutes into flying this new version I crashed it and the end of the arm crumpled like this:
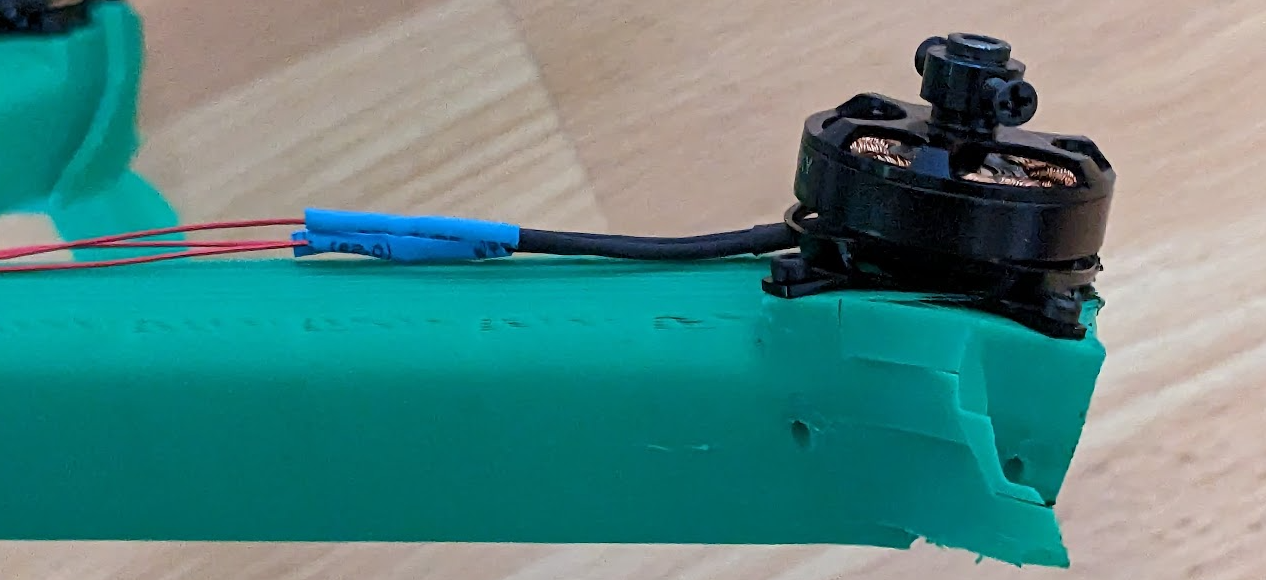
This actually bent the bottom of the motor because the screws were attached so well to the internal print that the impact with the bottom of the arm bent everything. Maybe I should print the arm side of the dovetail with no reinforcement so that it snaps off there.